Company Portal 
Added in version 6.3.5.
The Company Portal is a web portal for the end users of the company or organization that runs the CipherMail Gateway. It should not be confused with the Portal, which is used by external recipients to read secure messages, retrieve PDF passwords or use Webmail Messenger. The Company Portal is used by your own users to send SMS Text messages to external recipients.
The main use case is the PDF password mode “Send Generated Password Back to Sender” (see PDF Messenger). In this mode, the gateway generates a password for the encrypted PDF and emails it back to the sender. The sender is then responsible for delivering that password to the recipient over a different channel. The password notification email can optionally contain a link to the Company Portal for every recipient, which opens the “Send SMS” dialog with the recipient’s email address pre-filled. The user only has to check the telephone number and send the message.
To make it easy to look up telephone numbers, the Company Portal provides two address books which map an email address to one or more telephone numbers:
- Personal address book
Maintained by the end user in the Company Portal itself.
- Company address book
Maintained by the gateway administrator and shared by all users. This address book is read-only for the end user.
When a telephone number is looked up, the entries of both address books are combined. If an email address occurs in both address books, the entry from the personal address book takes precedence.
Accessing the Company Portal
The Company Portal is served on port 8444:
https://<hostname>:8444
Replace <hostname> with the fully qualified host name of the CipherMail
Gateway.
Note
The Company Portal is intended for internal users. If the gateway is reachable from the Internet, it is advised to restrict access to port 8444 with a firewall to the internal network or VPN.
Pages
After signing in, the following pages are available:
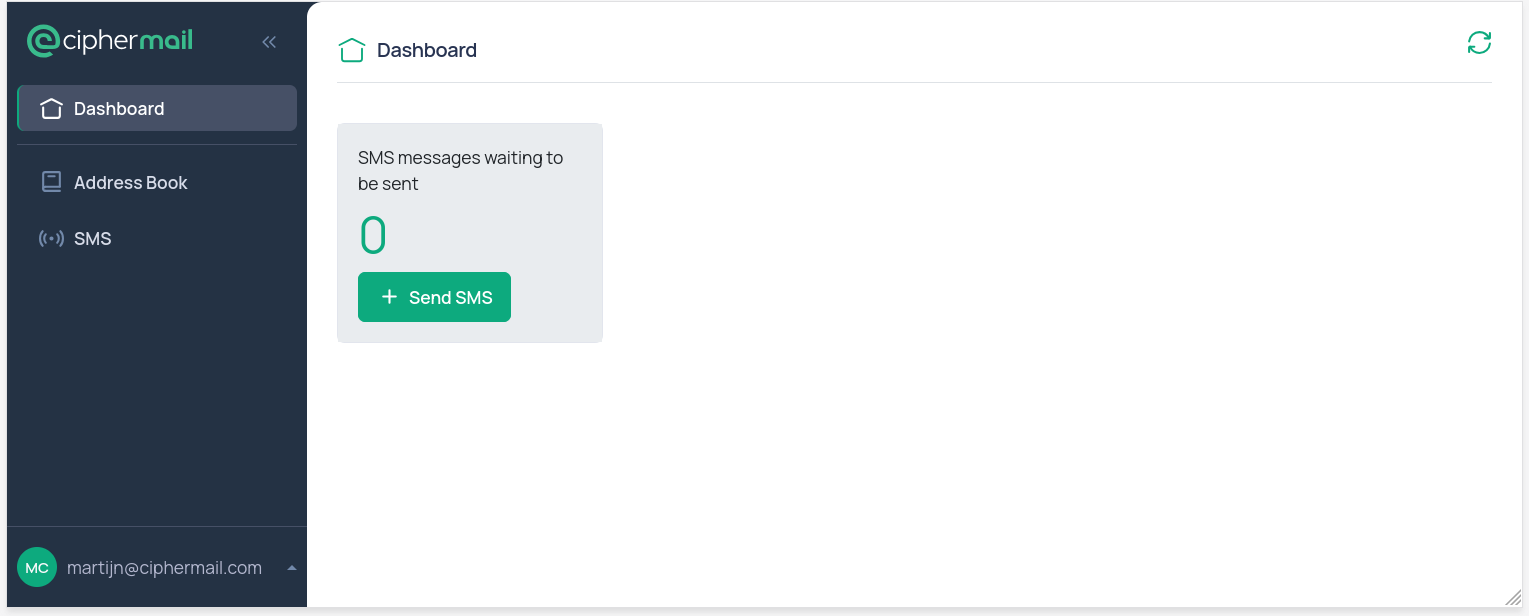
- Dashboard
Shows the number of SMS Text messages which are still queued for the logged in user and provides a shortcut for creating a new SMS Text message.
- Address Book
Shows the combined address book. Entries from the personal address book can be added, edited and deleted. Entries from the company address book are shown read-only.
- SMS
Shows the SMS Text messages sent by the logged in user which are not yet delivered, i.e., which are still queued. Messages which are handled by the SMS transport are removed from the queue. If a message cannot be delivered, the “Error message” column explains why. From this page a new SMS Text message can be created and queued messages can be deleted.
Hint
A user only sees and can only delete the SMS Text messages which were sent by that user. The full SMS queue of the gateway is only visible for an administrator (see SMS).
Sending an SMS Text message
When creating a new SMS Text message, the user can enter a telephone number directly, or enter (or select) an email address for which the telephone number is looked up in the combined address book. The telephone number must be in international format, starting with the country code (for example, +44…). Optionally, the email address and telephone number can be added to the personal address book when the message is sent.
Note
An SMS transport must be configured and active before any SMS Text message can be delivered (see SMS). Without a working transport, messages sent from the Company Portal will remain in the queue.
Hint
To protect the SMS transport against misuse, the number of SMS Text messages a user can send is rate limited. By default, a user can send at most 10 SMS Text messages per minute.
Configuration
The Company Portal settings can be found on the settings page under . Like all other gateway settings, they can be set at the global, domain and user level, which makes it possible to enable the Company Portal for the complete organization, for specific domains or for individual users only.
The following settings are available:
- Enabled
If enabled, the user is allowed to log in to the Company Portal. By default this setting is disabled, i.e., no one is allowed to log in.
- Portal Password
The password with which the user logs in to the Company Portal. The password is stored encoded (hashed). This setting is only relevant for username/password authentication. This is a user-only setting: a password shared by the users of a domain would let anyone who knows it log in as any of them.
- Company Portal Two-Factor Authentication enabled
If enabled, two-factor authentication (2FA) is enabled for the user (assuming a 2FA secret is configured for the user). This is a user-only setting because the 2FA secret is user specific.
- Company Portal Two-Factor Authentication required
If enabled, the user must set up 2FA before the Company Portal can be used.
- Company Portal Base URL
The base URL of the Company Portal, for example
https://ciphermail.example.com:8444. The base URL is used for the links to the Company Portal in email templates and as the basis for the password reset URL.Important
The “Send by SMS” link is only added to the password notification email if the Company Portal Base URL is set.
- Company Portal Password Policy
The password policy which is enforced when a Company Portal password is set. By default, a password must be at least eight characters long.
- Company Portal Password Reset Enabled
If enabled, the user is allowed to reset the Company Portal password with the “Forgot password” option on the login page. A password reset email is sent to the user’s email address using the “Company Portal Password Reset Mail Template” (). A password reset link is valid for 24 hours.
The settings can also be managed with the CLI. For example, to enable the Company Portal for all users and to set the base URL:
ciphermail-cli property global set --name company-portal-enabled --value true
ciphermail-cli property global set --name company-portal-base-url --value "https://ciphermail.example.com:8444"
To enable the Company Portal for a single user only, set the property for that user:
ciphermail-cli property user set --email user@example.com --name company-portal-enabled --value true
Company address book
The company address book is managed by the administrator and can be edited on the settings page under . Because this is a normal gateway setting, a company address book can be configured globally or per domain.
Every entry contains an email address and one or more telephone numbers and optionally a first name, last name and organization.
Authentication
The Company Portal supports three authentication methods:
Username and password
LDAP
Entra ID (OIDC)
Important
Whichever authentication method is used, the user is only allowed to log in if the “Enabled” setting applies to that user (see Configuration). The login name must always be a valid email address. This email address identifies the user and is used as the sender of the SMS Text messages.
Username and password
With username/password authentication, the user logs in with their email address and the Company Portal password. A user account must exist on the gateway and a Company Portal password must be set for that user.
The password can be set by an administrator on the user’s settings page () or with the CLI:
ciphermail-cli property user set --email user@example.com --name company-portal-password --value <password>
Alternatively, if “Company Portal Password Reset Enabled” is set, the user can set an initial password with the “Forgot password” option on the login page.
Hint
The number of failed login attempts is rate limited. By default, an account is temporarily banned after five failed login attempts.
LDAP
The Company Portal can authenticate users against an external LDAP server. The
LDAP server should support bind authentication. LDAP authentication is
configured in the same way as LDAP authentication for the admin (see
LDAP ), with the difference that the Ansible variables are prefixed
with ciphermail_company_portal_backend__ instead of ciphermail_backend__:
ciphermail_company_portal_backend__ldap_authentication_uri: ''
ciphermail_company_portal_backend__ldap_authentication_user_dn_pattern: ''
ciphermail_company_portal_backend__ldap_authentication_search_filter: ''
ciphermail_company_portal_backend__ldap_authentication_search_base: ''
ciphermail_company_portal_backend__ldap_authentication_deref_link_flag: false
ciphermail_company_portal_backend__ldap_authentication_search_sub_tree: false
ciphermail_company_portal_backend__ldap_authentication_search_time_limit: 0
ciphermail_company_portal_backend__ldap_authentication_bind_user_dn: ''
ciphermail_company_portal_backend__ldap_authentication_bind_password: ''
The meaning of the individual variables is explained in LDAP .
Example configuration with direct bind:
---
ciphermail_company_portal_backend__ldap_authentication_uri: 'ldaps://ldap.example.com:636'
ciphermail_company_portal_backend__ldap_authentication_user_dn_pattern: 'mail={0},ou=Users,o=ciphermail,dc=example,dc=com'
Example configuration with search bind:
---
ciphermail_company_portal_backend__ldap_authentication_uri: 'ldaps://ldap.example.com:636'
ciphermail_company_portal_backend__ldap_authentication_search_base: 'o=ciphermail,dc=example,dc=com'
ciphermail_company_portal_backend__ldap_authentication_search_filter: 'mail={0}'
ciphermail_company_portal_backend__ldap_authentication_search_sub_tree: true
ciphermail_company_portal_backend__ldap_authentication_bind_user_dn: 'uid=admin,ou=Users,o=ciphermail,dc=example,dc=com'
ciphermail_company_portal_backend__ldap_authentication_bind_password: 'password'
After creating or changing the Ansible override file, run the playbook:
sudo cm-run-playbook
Important
With LDAP authentication for the Company Portal, the authenticated user must
be a valid email address, i.e., the users log in with their email address.
The LDAP configuration should therefore bind or search on an attribute which
contains the email address (for example mail or userPrincipalName).
Note
LDAP authentication is used in addition to username/password authentication. A user with a Company Portal password can therefore still log in with that password.
Entra ID
The Company Portal can authenticate users with OpenID Connect (OIDC) using Microsoft Entra ID. Setting up Entra ID for the Company Portal is similar to setting up Entra ID for the admin (see EntraID ), with two important differences:
A separate Ansible role, and therefore a separate set of Ansible variables, is used for the Company Portal.
Any email address which can log in with OIDC is allowed to log in to the Company Portal. Contrary to the admin, a user does not have to be added to the gateway prior to the first login. It is therefore advised to enable the Company Portal globally or per domain.
To set up Entra ID authentication for the Company Portal, complete the steps below.
Create an App Registration on the Entra ID page
Create a client secret
Create an Ansible override file
Run the playbook
Creating the App Registration and the client secret is done in the same way as described in EntraID , with the difference that the “Redirect URI” must be set to the Company Portal:
https://<hostname>:8444/api/login/oauth2/code/entraid
Replace <hostname> with the fully qualified host name of the CipherMail
Gateway.
Create the Ansible override file using the Cockpit File Browser (or use an SSH client)
sudo vi /etc/ciphermail/ansible/group_vars/all/company-portal-entraid.yml
---
ciphermail_company_portal_entraid__enabled: true

# must be set to your Azure Tenant ID
ciphermail_company_portal_entraid__azure_tenant_id: '<tenant-id>'

# must be set to the client id
ciphermail_company_portal_entraid__client_id: '<client-id>'

# must be set to the client secret
ciphermail_company_portal_entraid__client_secret: '<client-secret>'

# must be set to the fully qualified external hostname of the gateway
ciphermail_company_portal_entraid__hostname: 'ciphermail.example.com'
Replace <tenant-id> with your tenant ID, <client-id> with the client ID
(which can be found on the “App registration overview page”) and
<client-secret> with the client secret value.
After creating or changing the Ansible override file, run the playbook:
sudo cm-run-playbook
When the Company Portal login page is opened, a “Login with Entra ID” option is shown. Selecting this option starts the OpenID Connect (OIDC) sign-in process.
Hint
If sign-in fails, verify that the redirect URL exactly matches what is configured in Entra ID, that the email address of the Entra ID account is a valid email address for which the Company Portal is enabled, and that time is synchronized on all systems.
Note
The Company Portal back-end handles an unreachable Entra ID the same way the
admin back-end does: it starts with Entra ID login switched off and switches
it on as soon as Entra ID can be reached, see
When Entra ID cannot be reached. The settings described there are set for
the Company Portal with the ciphermail_company_portal_backend__ variants
of the Ansible variables listed there.